

3

4

5

6

7

8
How to :
Kitchen Backsplashes
Step 1:
Measuring
To measure the area you wish to have tiled simply calculate the total area by multiplying the width by the length of various sections of the walls. Add about 10% overage to your total to compensate for waste and future repairs that may arise. Have these measurements with you for your first visit to the tile showroom.
Step 2:
Surface Preparation
Before installing the tiles, prep all the holes, bumps, or indents by smoothing out the area with drywall compound. Make sure to turn off all electrical power, remove cover-plates and valances and cover counter tops before installation begins.
Step 3:
Layout
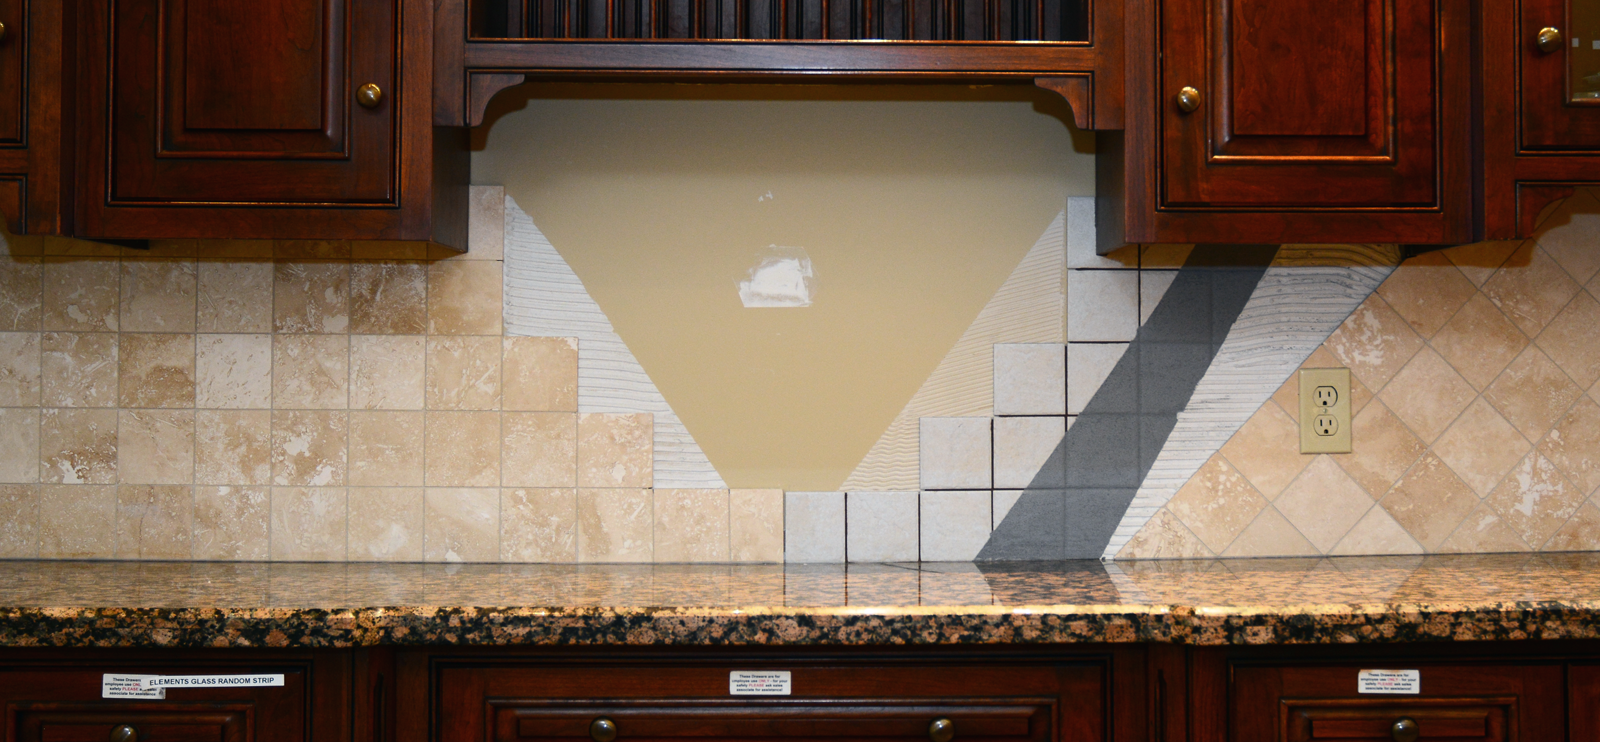
It may seem easy to start on one wall and begin setting tile, but when the backsplash meets the focal point in kitchens, odd size pieces or misalignments can stick out. The recommended starting point is in behind the stove. Draw vertical line centered behind the stove and a horizontal line measured one full tile off the counter top. This right-angle will be your starting point.
A properly prepared wall will help achieve the best results.
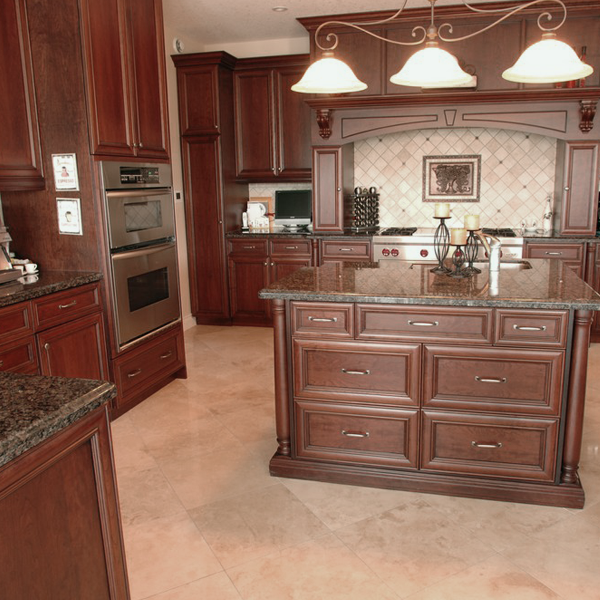
Looking for Design Inspiration
Backsplashes can add a distinctive touch along the narrow band of wall between the counter top and upper cabinets. In older homes a new backsplash can bring a tired kitchen back to life.
Try one of these unique designs or visit our showroom and speak with one of our sales associates today.


Step 4:
Applying Adhesive
Adhesive is applied with a grooved trowel held at a 45° angle to the wall. Drag the trowel horizontally along the wall and the groves on the edge of the trowel will leave little raised rows of adhesive.
Use a trowel that meets the specifications for your tile – for example, large tiles require extra adhesive and larger grooves. Your goal is to use plenty of adhesive so that at least 75%-80% of the back surface of the tile is covered.
Step 5:
Setting The Tile
As you place each tile, give them a slight twist or wiggle as you put them into place and square them up. Between each tile, plastic tile spacers may be used to keep spacing consistent.
When cutting around electrical boxes is required, simply remove the outlet (not the whole electrical box) and slip the edge of the tile behind the metal horns that hold the screws. Longer screws may be needed to reinstall the outlet
Step 6:
Applying Grout
Once the tile has dried over night, remove spacers and apply grout to the backsplash.
After the grout has set and the tile has been washed, a thin bead of silicone
may be applied where tile meets counter top (and vertical corners if desired).
Pro Tip
Porcelain tile is very hard and brittle, and can often chip when cut. When cutting these tiles, maintain a slow, steady and even pressure to avoid cracks and chips. To ensure clean corners, cut a 2” relief slit along the end and then flip the tile around to finish the cut.
If you are cutting porcelain with a saw that allows you to adjust the depth of the cut, make several shallow cuts about 1/8” deep to reduce the risk of chipping.