

25

26

27
Step 1
Surface Preparation
Prepare the stairs and surrounding area by removing the trim, carpet, or other items from the stairwell area. If existing wood nosings are to remain, ensure to mask them off with tape before you begin. Remove nails, tacks or staples from the wooden stairs and inspect each step for holes and cracks.
If angled risers are required, cut 1/2” plywood boards and screw them into the top of the stair nose and secure them into the bottom of the riser of each step.
Remove sanding dust and other debris from the steps. Sweep the area, then wipe down each step with a damp cloth or sponge.
Always start on the top step and work your way down the stairs
Step 2
Applying the Substrate
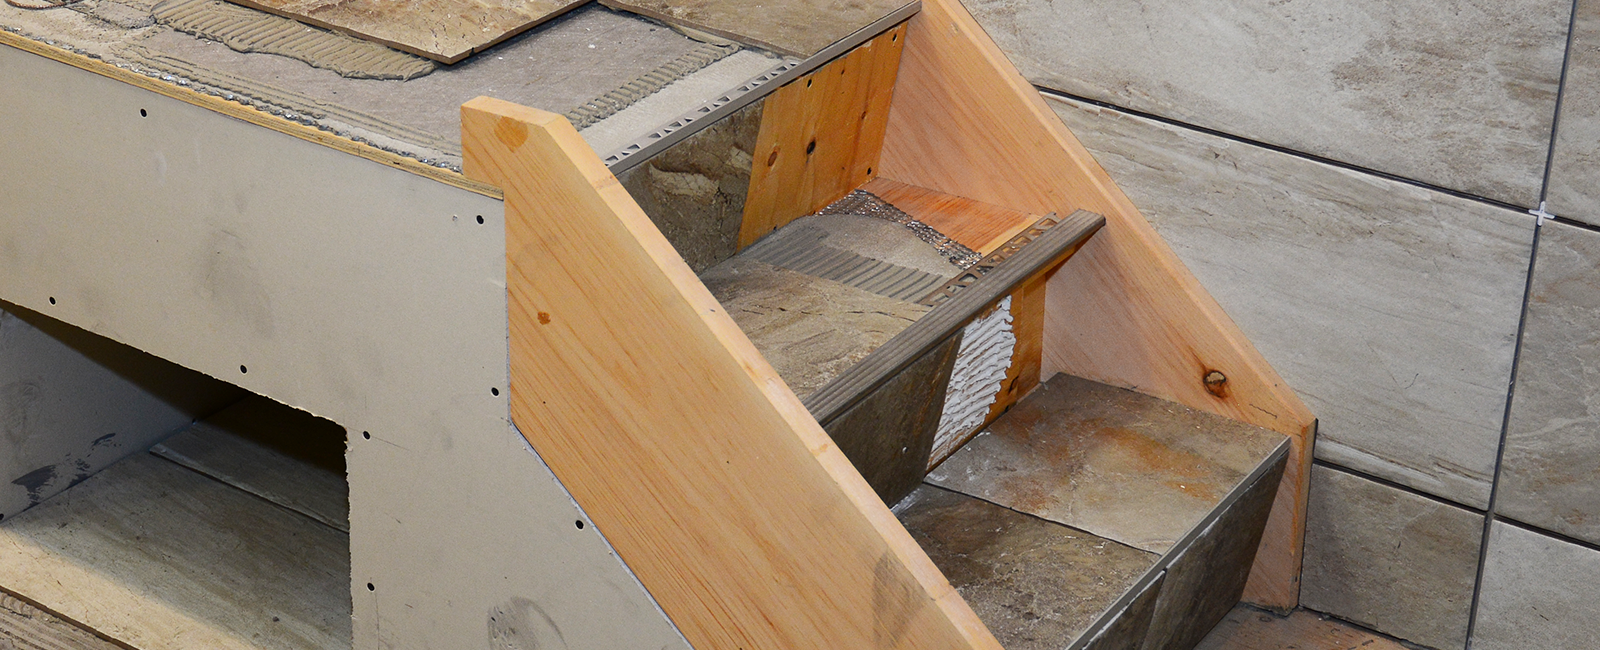
Install wire lath (mesh) and scratch coat to the step only and let cure overnight. If wood nosing is being used make sure to install it prior to the wire lath and scratch coat.
Step 3
Tile Layout and Installation
Precut any metal nosing being used or straight edge metal that will sit in-between wood and tile for all steps prior to installation. Using the trowel size indicated as per installation guidelines, apply the mortar in small sections, one step at a time.
Position the first tile in the centre of the riser (vertical surface of the step) and make it so the top edge of the tile is even with the step tread (horizontal surface of the step). Place tile spacers on each corner of the tile and continue placing tiles, working out from the center. Repeat the process across the whole row. Mark and cut the tiles at either end if needed.
Secure the tile to the step treads in the same fashion as the tile placed on the riser. Position the tiles so the gaps between each tile are in line with one another, aligning the front edge of the tile flush with the surface of the vertical tile on the riser.
Allow the thin-set adhesive to dry for 24 hours before applying grout.
Pro Tip
When picking a ceramic tile to use on stairs consider the amount of traffic they will receive. If the stairs are in a high traffic area, make sure to choose a tile that will be strong and durable enough to handle the volume. Porcelain tiles that won’t easily crack and chip are the best to use. They often cost more at the onset, but will increase the life of your stairs and will save you the headache of constantly making repairs.